
Buyer Recruitment
Field Nation now provides buyers’ with an easier way to recruit and train potential providers. Contact our Field Nation operations team to get started. By picking providers who have completed your recruitment, you can dramatically increase your company’s quality. Additionally, our recruitment system is great when planning for large projects and rollouts.
Our Recruiting Process
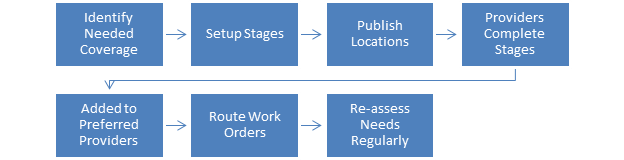
Identify Needed Coverage
Before you can get started you will need to pinpoint where you need providers. This is based on where you have locations that need coverage and what skillsets you require of providers. Once this is determined and you have spoken with a member of the operations team here at Field Nation, you can get started on setting up your customized recruitment process for the provider.
Setting up the Recruitment
1. Contact Field Nation’s operations team and have them setup a recruitment effort for you. Your sales representative may also be able to help you with this.
2. After setting up a Recruitment Effort with our operations team login to your customer account at www.fieldnation.com/ and click on “Recruitment Manager” in the ‘Resource Manager” menu.

3. Locate your Recruitment Effort and click on the name of your recruitment.

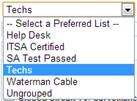
3. You will need to set up what “Preferred Providers” list you will want these providers saved to if they complete your recruitment process. Select the drop down menu to choose which list you want them added to.
Note:
You can add a list to this list by clicking “Add List” next to the “Select a Preferred List” drop down menu.
4. You can change the title to your Recruitment Effort by typing in your title in the “Recruitment Title” field.
5. Select the “Industry” that this Recruitment Effort is for in the ‘Select Industry” drop down menu.

Note:
If there are any related skillsets to the Industry you have chosen please select them by checking the boxes that correspond to the skillset.
![]()
6. Provide a detailed “Service Description” of the job you’re recruiting for. Make sure to specify any requirements and experiences that you want for this position and what they will be doing for the work order.

7. Give an “Explanation of Pay” for the job. Be specific if it is a fixed or an hourly pay. Also add any specifics, for example is over time is given or not.

8. Click
![]() once
you’ve completed this section.
once
you’ve completed this section.
Note:
The “Recruitment Limits” at the bottom are set up by our operations team here at Field Nation. Please contact them if you need to update this information.
Setup Stages
9. Click
the ![]() tab
to start adding stages to your Recruitment Effort.
tab
to start adding stages to your Recruitment Effort.
10.
Click ![]() to add a stage in the
recruitment process.
to add a stage in the
recruitment process.
11. Type a “Stage Title” in the corresponding field.
![]()
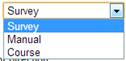
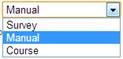
12. Choose what type of stage you want in the “Stage Type” drop down menu. There are 3 types to choose from:
a. You can choose a “Survey” type stage.
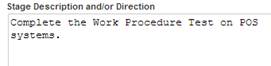
i. Add a “Stage Description and/or Direction” for the survey question(s).
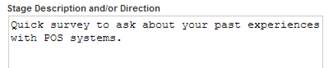
ii. “Setup a Survey Question”, make sure your question is relevant to the survey topic. If you require an answer to the question or if this needs to be a file upload check the boxes below the “Questions” field.
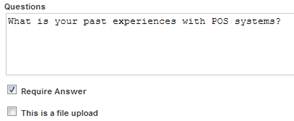
Note:
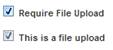
If the “File Upload” is required please make sure to check the “Require File Upload” check box.
iii. If
you’d like to add more questions click![]() .
.
iv. When
you’ve completed editing this stage click![]() .
.
b. You can choose a “Manual” type stage. For example, this would be used for an Interview or sending something via mail, etc.
i. Check the “Let them mark as completed” box if you’d like them to mark this stage as complete when they have completed the task. For example if they need to receive something in the mail they can mark this as complete when they have received it. If you need to mark this stage as complete then leave the checkbox bank.
![]()
ii. Add a “Stage Description and/or Direction” for the manual stage.

iii.
When
you’ve completed editing this stage click![]() .
.
c. You can choose a “Course” type stage.

i. Select your ‘Course” that you’d like them to take.
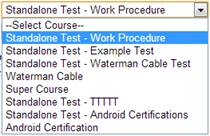
Note:
If you do not have any courses uploaded you will first need to make sure that your company’s training module is turned on. If it is not please contact out operations team here at Field Nation to have us turn this on for you.
ii. Add a “Stage Description and/or Direction” for the course stage.
iii.
When
you’ve completed editing this stage click![]() .
.
13. Use the “Enabled” drop down menu to enable or disable this stage.
![]()
Note:
If you choose “No” the stage will be permanently disabled.
14. Optional** you can “Setup Notifications” so you or an admin of your company is notified when a provider starts, completes, or fails a stage.
15. Remember
to click ![]() when
you’ve completed editing a stage.
when
you’ve completed editing a stage.
Publish Locations
16.
Click the ![]() tab to add locations
of where you’ll be looking for providers.
tab to add locations
of where you’ll be looking for providers.
17. Click
![]() to start adding
locations.
to start adding
locations.
18. You have 4 options to add locations:
a. “Add a Single Location” if you would like to search for a provider from a single location.

Note:
If you need to make your location nationwide you will need to contact our operations team here at Field Nation.
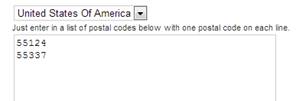
b. “Add Multiple Postal Codes” if you want to search for a provider through postal codes for the United States of America or Canada.
c. “Add Multiple Locations” via a CSV file to search for providers around those areas.
i.
To
upload a CSV file click ![]() to locate your CSV
and upload it.
to locate your CSV
and upload it.
Note:
You will need to follow our standard location template for your CSV file.
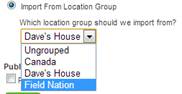
d. “Import From Location Group” if you’d like to import your settings from a previous location group.
19. Check the “Publish the location(s)” box if you’d like to publish these locations now.
Note:
If you’d like to publish them now you will need to choose how many days you want these locations published for. You can only publish for up to the max days that have been set for this Recruitment Effort by our operations team here at Field Nation.
20. Click ![]() to
save these locations.
to
save these locations.
Providers Complete Stages
Once your recruitment is published, providers will be able to see it and begin applying for it. They will then work through each stage of the recruitment process. You can track their progress, leave notes, and view their survey results.
21. To check a providers progress click the ![]() tab.
tab.
22. Click ![]() next
to the providers name to check their progress, mark stages as complete as
needed, and/or leave notes on this provider.
next
to the providers name to check their progress, mark stages as complete as
needed, and/or leave notes on this provider.
Added to Preferred Providers and Route Work Orders
When they have completed all of the stages in your recruitment, they will automatically be added to your preferred providers list. You can view your preferred providers list after you login to Field Nation. You can also route work orders directly to those in your preferred providers list. Also, when you publish a work order to Field Nation’s marketplace, we will highlight those who request the work orders and are in your preferred providers list. By picking or routing to those who have completed your recruitment, you can dramatically increase your company’s quality!
Reassess Needs Regularly
Field Nation recommends that your team use our maps feature to track your progress and identify areas in which you need more coverage. Look for areas in which you have many locations, but very few providers. Then, re-publish those locations so that providers in those areas will be notified that you are recruiting in their area. Alternatively, find providers who failed your recruitment process or did not complete your recruitment process but are in areas that you need coverage. Contact them directly and help them to complete your recruitment process. We recommend that you reassess your needs quarterly or bi-annually.

This video demonstrates the use of